PrintNanny OS Image
This section will walk you through writing a PrintNanny OS image to your SD card.
1. Install Raspberry Pi Imager
Download and install Raspberry Pi Imager.
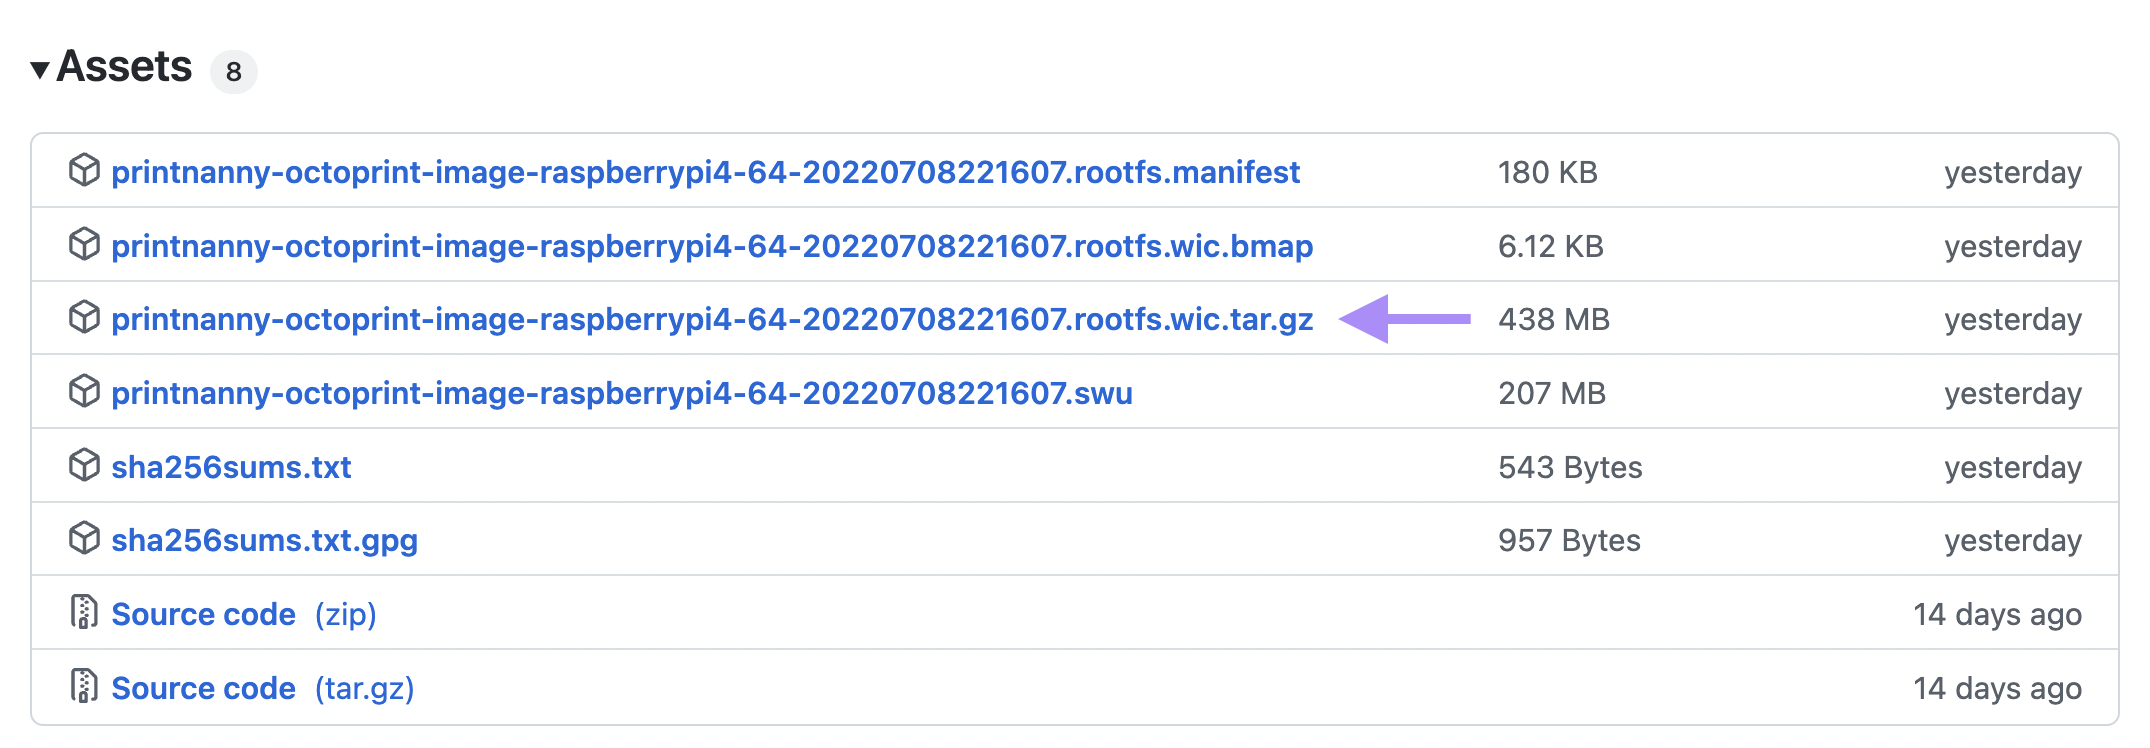
2. Download PrintNanny OS image
Browse to the PrintNanny OS releases page and download the latest .wic.gz file.
3. Burn Image to SD Card
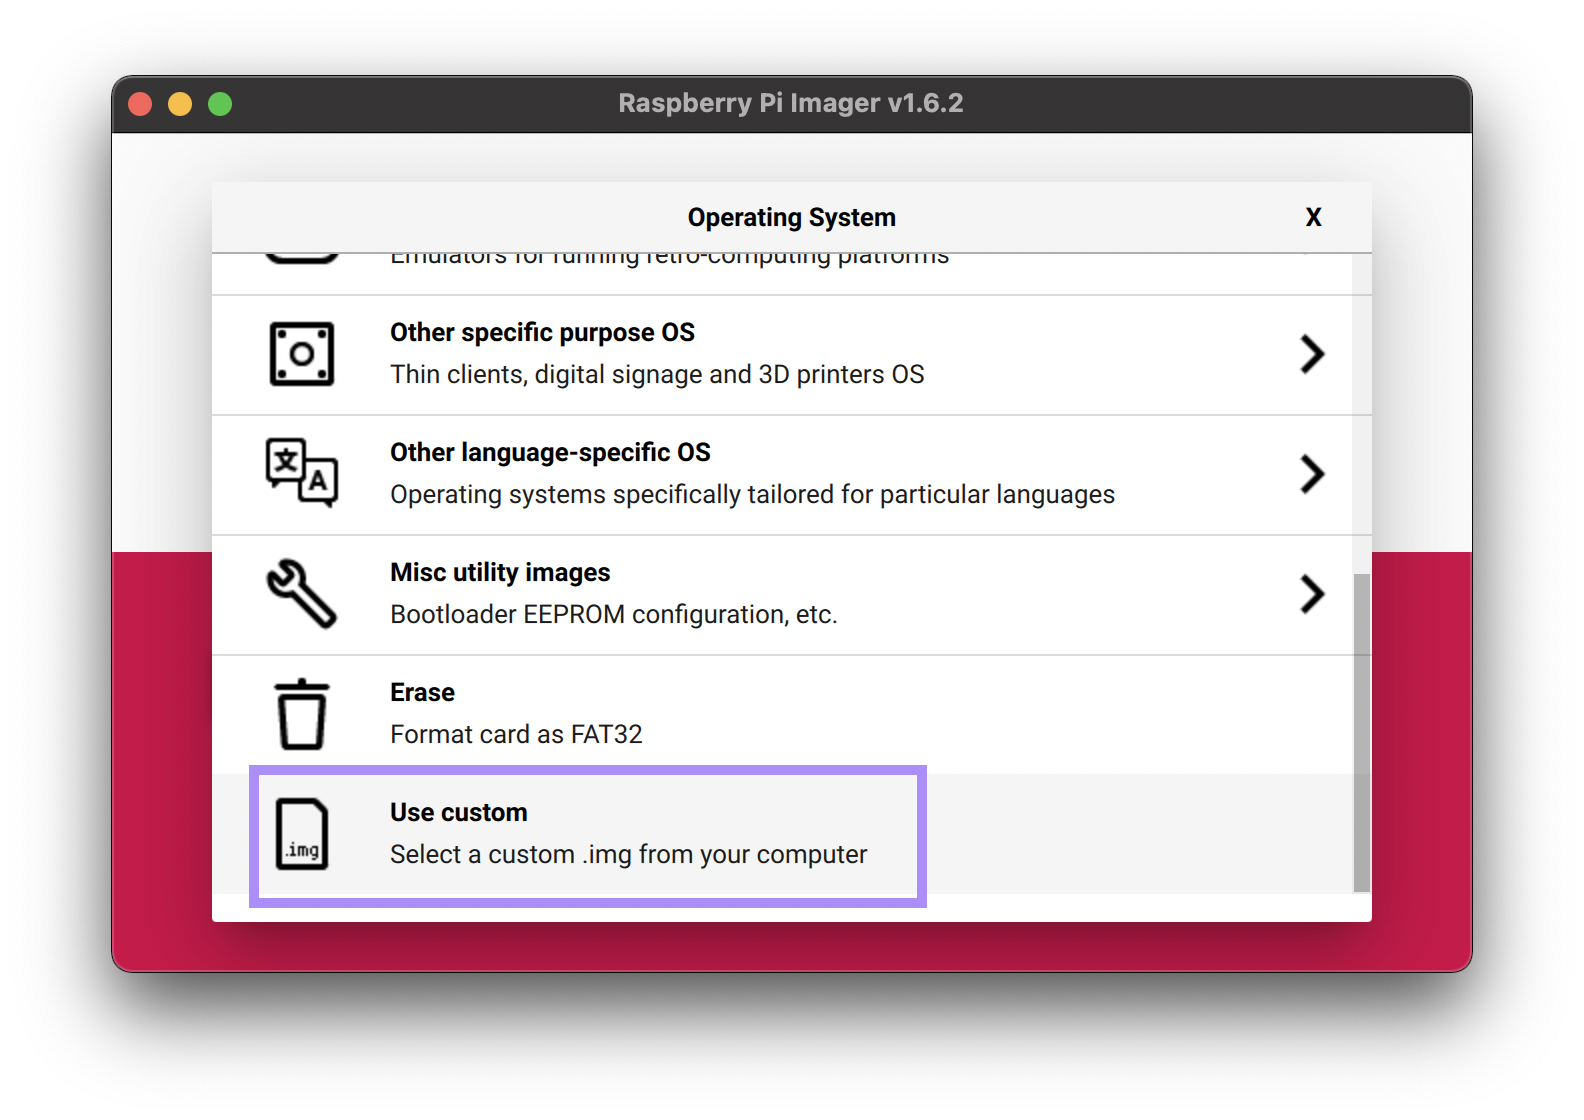
- Open Raspberry Pi Imager. Click the Choose OS button, then select Use custom at the bottom of the menu.
 .
.
- Click the Choose Storage button and select your MicroSD Card from the menu.
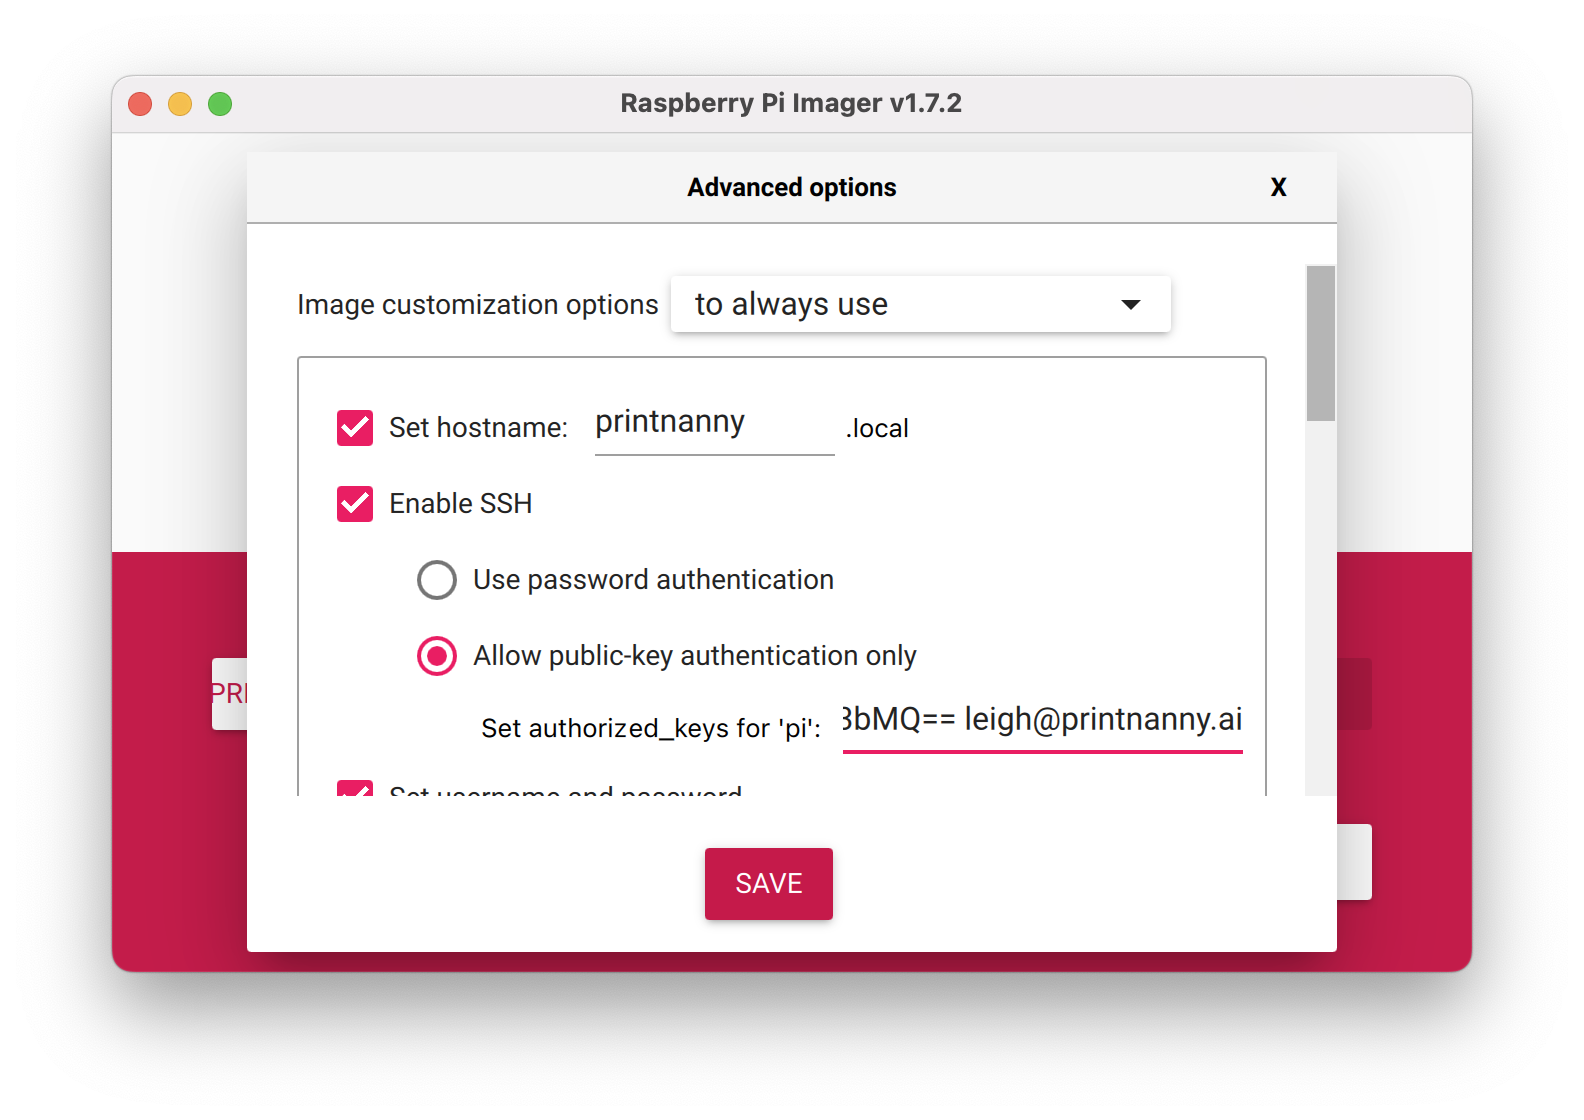
- Click the ⚙️ Gear Icon or press ctrl + shift + x to open **Advanced.
- Set the hostname of your Raspberry Pi (must be unique on your network.
 .
.
Check the Enable SSH box and set a password for your Pi.
If you prefer to use SSH authentication, provide your public key instead
Configure your wireless LAN SSID and passphrase.
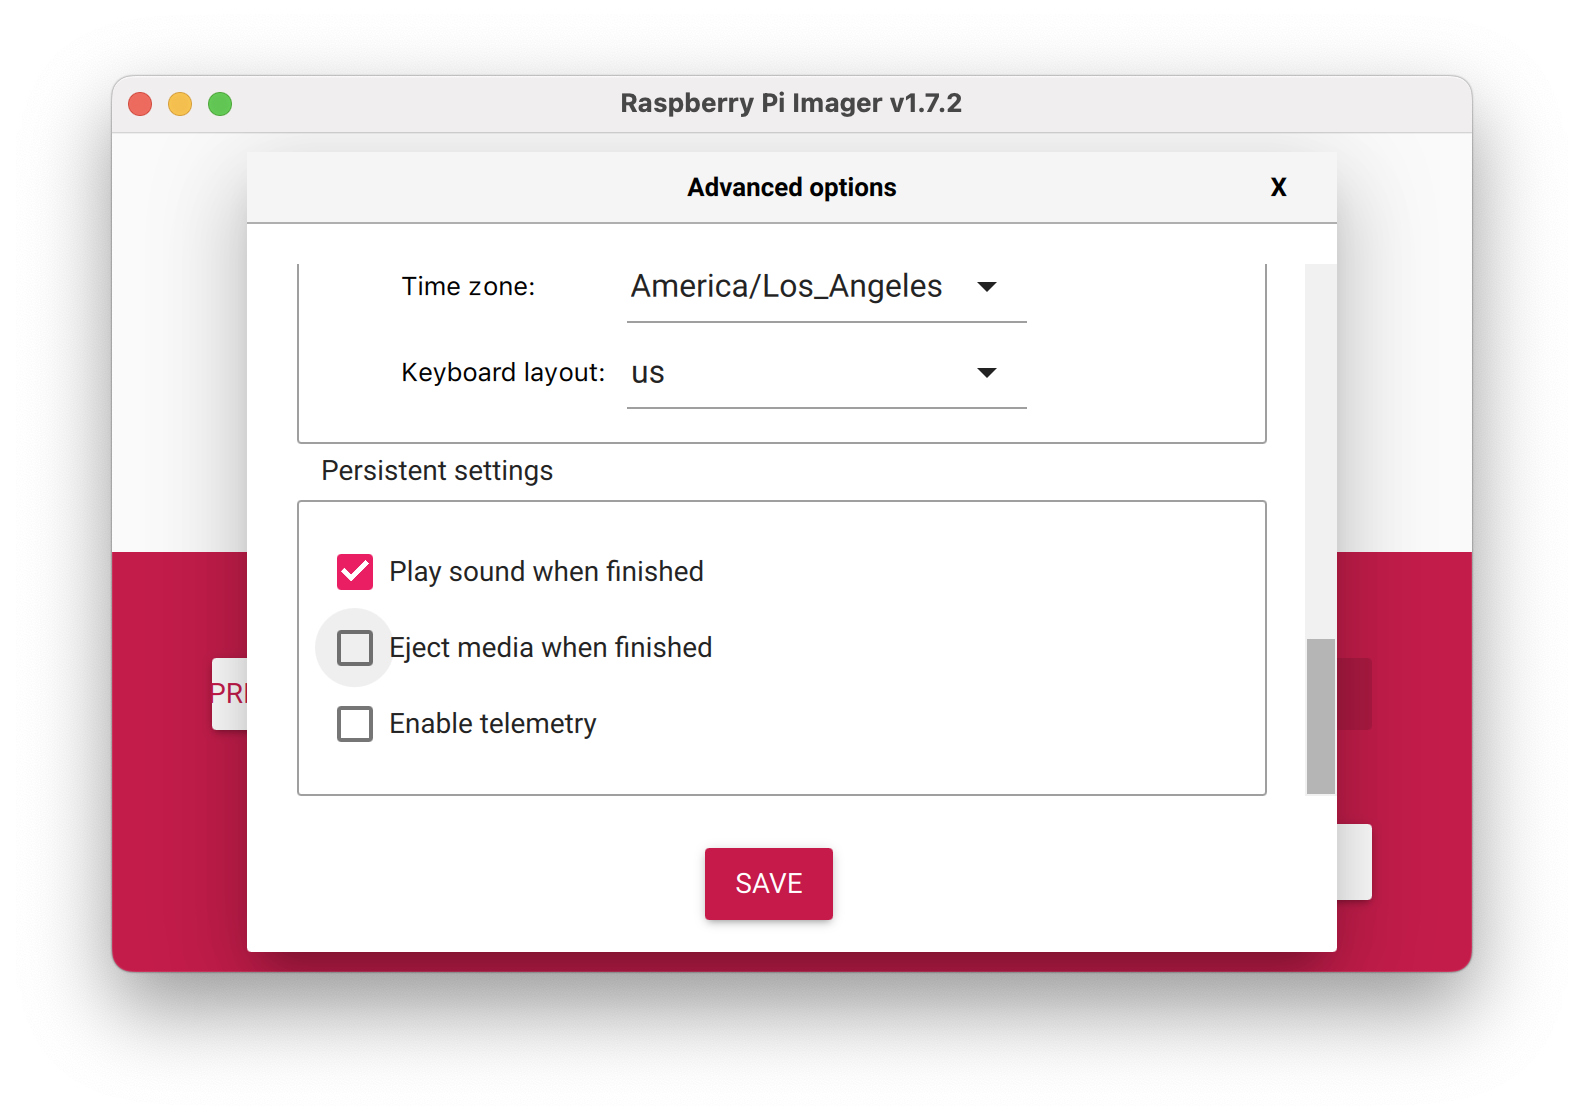
Set your locale and keyboard layout.
 .
.
- Click Save to save your settings and then Write to burn the image to your SD card.