File Sync (SDWire)
What does an SDWire board do?
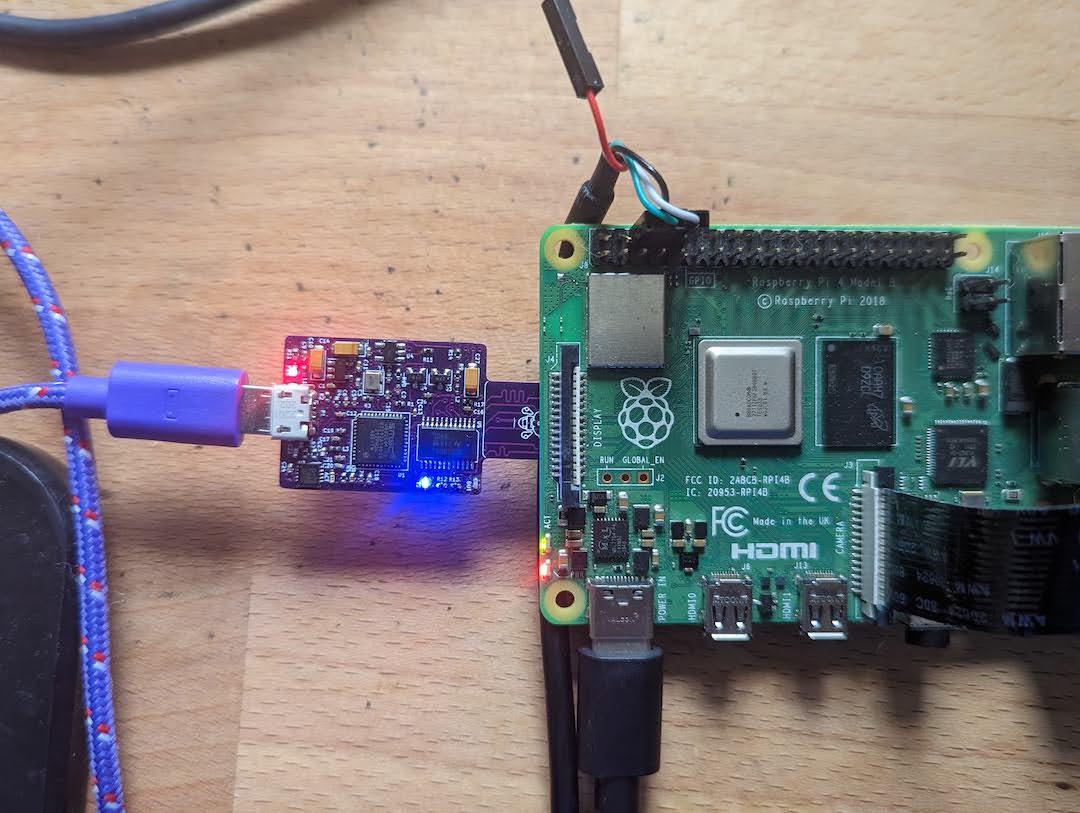
SDWire's design is dead simple. The board fits a micro SD card slot, for example, the micro SD slot on a Raspberry Pi.
I use the SDWire board to "re-image" an SD card over a USB connection. This helps me smoke test a PrintNanny OS release candidate without physically inserting/removing the SD card from a Raspberry Pi.
The board's main feature is a USB mux (multiplexer) with two modes:
"Test server" mode, which allows you to write data to an SD card over a USB connection. "Device-under-test" or "DUT" mode, which allows another device (like Raspberry Pi) to read/write to the SD card.
For more info, check out the blog post about PrintNanny SDWire's development.
Installation
This section will show you how to install the printnanny-sdwire command-line tool.
Build CLI from Source
If there isn't a pre-built binary available for your platform/distribution, you can build from source.
1. Clone Github Repo
$ git clone https://github.com/bitsy-ai/printnanny-sdwire
2. Install Pre-requisites
You'll need to install the following pre-requisite libraries:
- GNU Make / GCC
libusblibftdi1
On Debian/Ubuuntu distributions, install pre-requisites using apt:
$ sudo apt-get update
$ sudo apt-get install libusb-1.0-0-dev libftdi1-dev
For RHEL distrbutions, install pre-requisites using yum:
$ yum update
$ yum install libusb libftdi
3. Build
Run the following commands to build from source:
$ cd src/
$ make
Optionally, copy the binary to a location in your $PATH:
$ sudo cp sdwire /usr/local/bin/printnanny-sdwire
Usage
The following section describes how to use SDWire with two machines:
- Host machine (any Linux device)
- Test machine (any device that boots from an SD card)
List SDwire devices
Connect your SDWire board to your host computer using a USB cable.
Run the following command to verify your SDWire board is connected:
$ printnanny-sdwire --list
Number of FTDI devices found: 1
Dev: 0, Manufacturer: SRPOL, Serial: <unique serial number>, Description: sd-wire
Your SDWire board will arrive pre-programmed with a unique serial number.
If you see an error libusb_open() failed, re-run the command using sudo.
$ printnanny-sdwire --list
Number of FTDI devices found: 1
ftdi_usb_get_strings failed: -4 (libusb_open() failed)
$ sudo printnanny-sdwire --list
Number of FTDI devices found: 1
Dev: 0, Manufacturer: SRPOL, Serial: <unique serial number>, Description: sd-wire
Mode: Test Server
In Test Server mode, the SDWire board is available for read/write operations originating from your host machine.
To put the device into Test Server mode, run:
$ printnanny-sdwire --device-serial=<serial number> --ts
If you see an error libusb_open() failed, re-run the command using sudo.
When the SDWire is in Test Server mode, a solid blue LED labeled TS will remain lit.
Mode Device-Under-Test
In Device-Under-Test mode, the SDWire board is available for read/write operations originating from the test machine.
To put the device into Device-Under-Test mode, run:
$ printnanny-sdwire --device-serial=<serial number> --dut
When the SDWire is in Device-Under-Test mode, a solid green LED labeled DUT will remain lit.
If you see an error libusb_open() failed, re-run the command using sudo.
Other Usage
$ printnanny-sdwire --help
Usage: sdwire command
  -l, --list                     lists all sd-mux devices connected to PC
  -i, --info                     displays info about device
  -o, --show-serial              displays serial number of given device
  -r, --set-serial=STRING        writes serial number to given device
  -t, --init                     initialize target board
  -d, --dut                      connects SD card and USB to the target board
  -s, --ts                       connects SD card and USB to the test server
  -p, --pins=INT                 write pin state in bitbang mode
  -c, --tick                     turn off and on power supply of DUT
  -u, --status                   show current status: DUT or TS or NOINIT
  -y, --dyper1=STRING            Connect or disconnect terminals of 1st dynamic jumper;
                                 STRING = "on" or "off"
  -z, --dyper2=STRING            Connect or disconnect terminals of 2nd dynamic jumper;
                                 STRING = "on" or "off"
  -m, --tick-time=INT            set time delay for 'tick' command
  -v, --device-id=INT            use device with given id
  -e, --device-serial=STRING     use device with given serial number
  -k, --device-type=STRING       make the device of this type
  -x, --vendor=INT               use device with given vendor id
  -a, --product=INT              use device with given product id
  -n, --invert                   invert bits for --pins command

Help options:
  -?, --help                     Show this help message
      --usage                    Display brief usage message